
OpenClaw接入飞书应用
1. 创建飞书应用
登录飞书开放平台:https://open.feishu.cn/ ,在开发者后台中创建应用

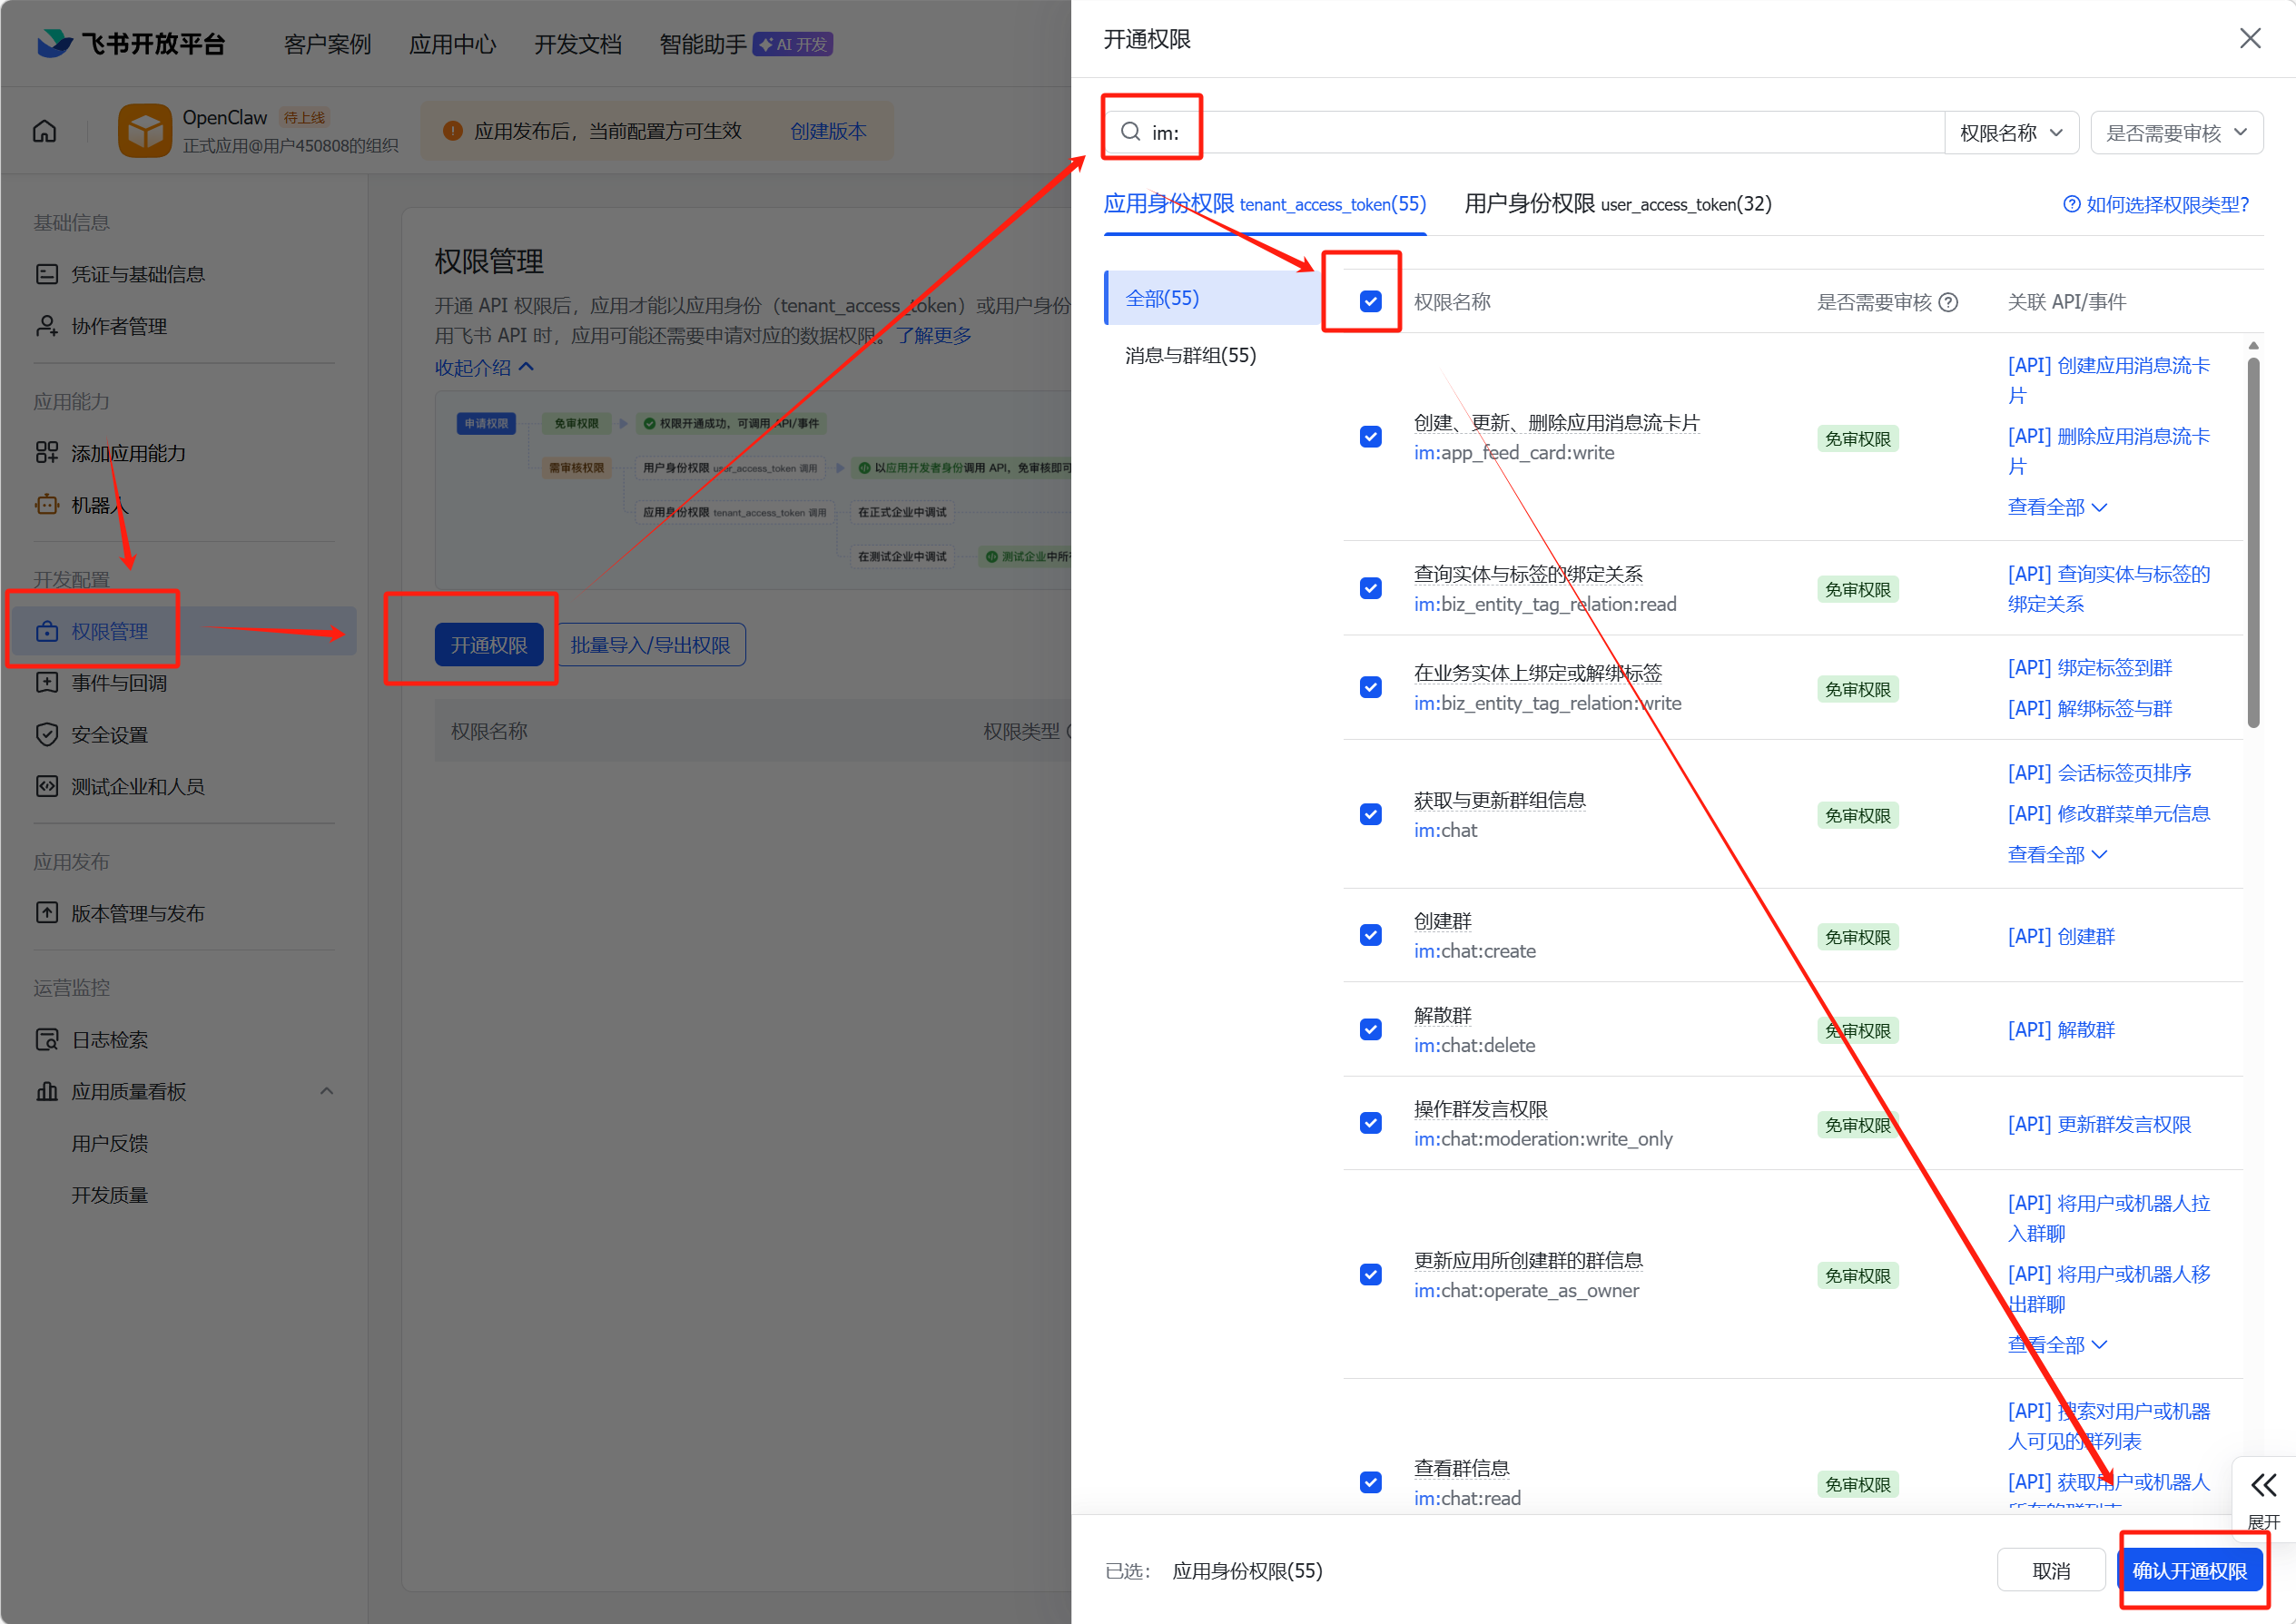
2. 给应用开通回复信息权限
权限管理 --> 开通权限 --> 搜索'im:' --> 勾选全部 --> 确认开通权限
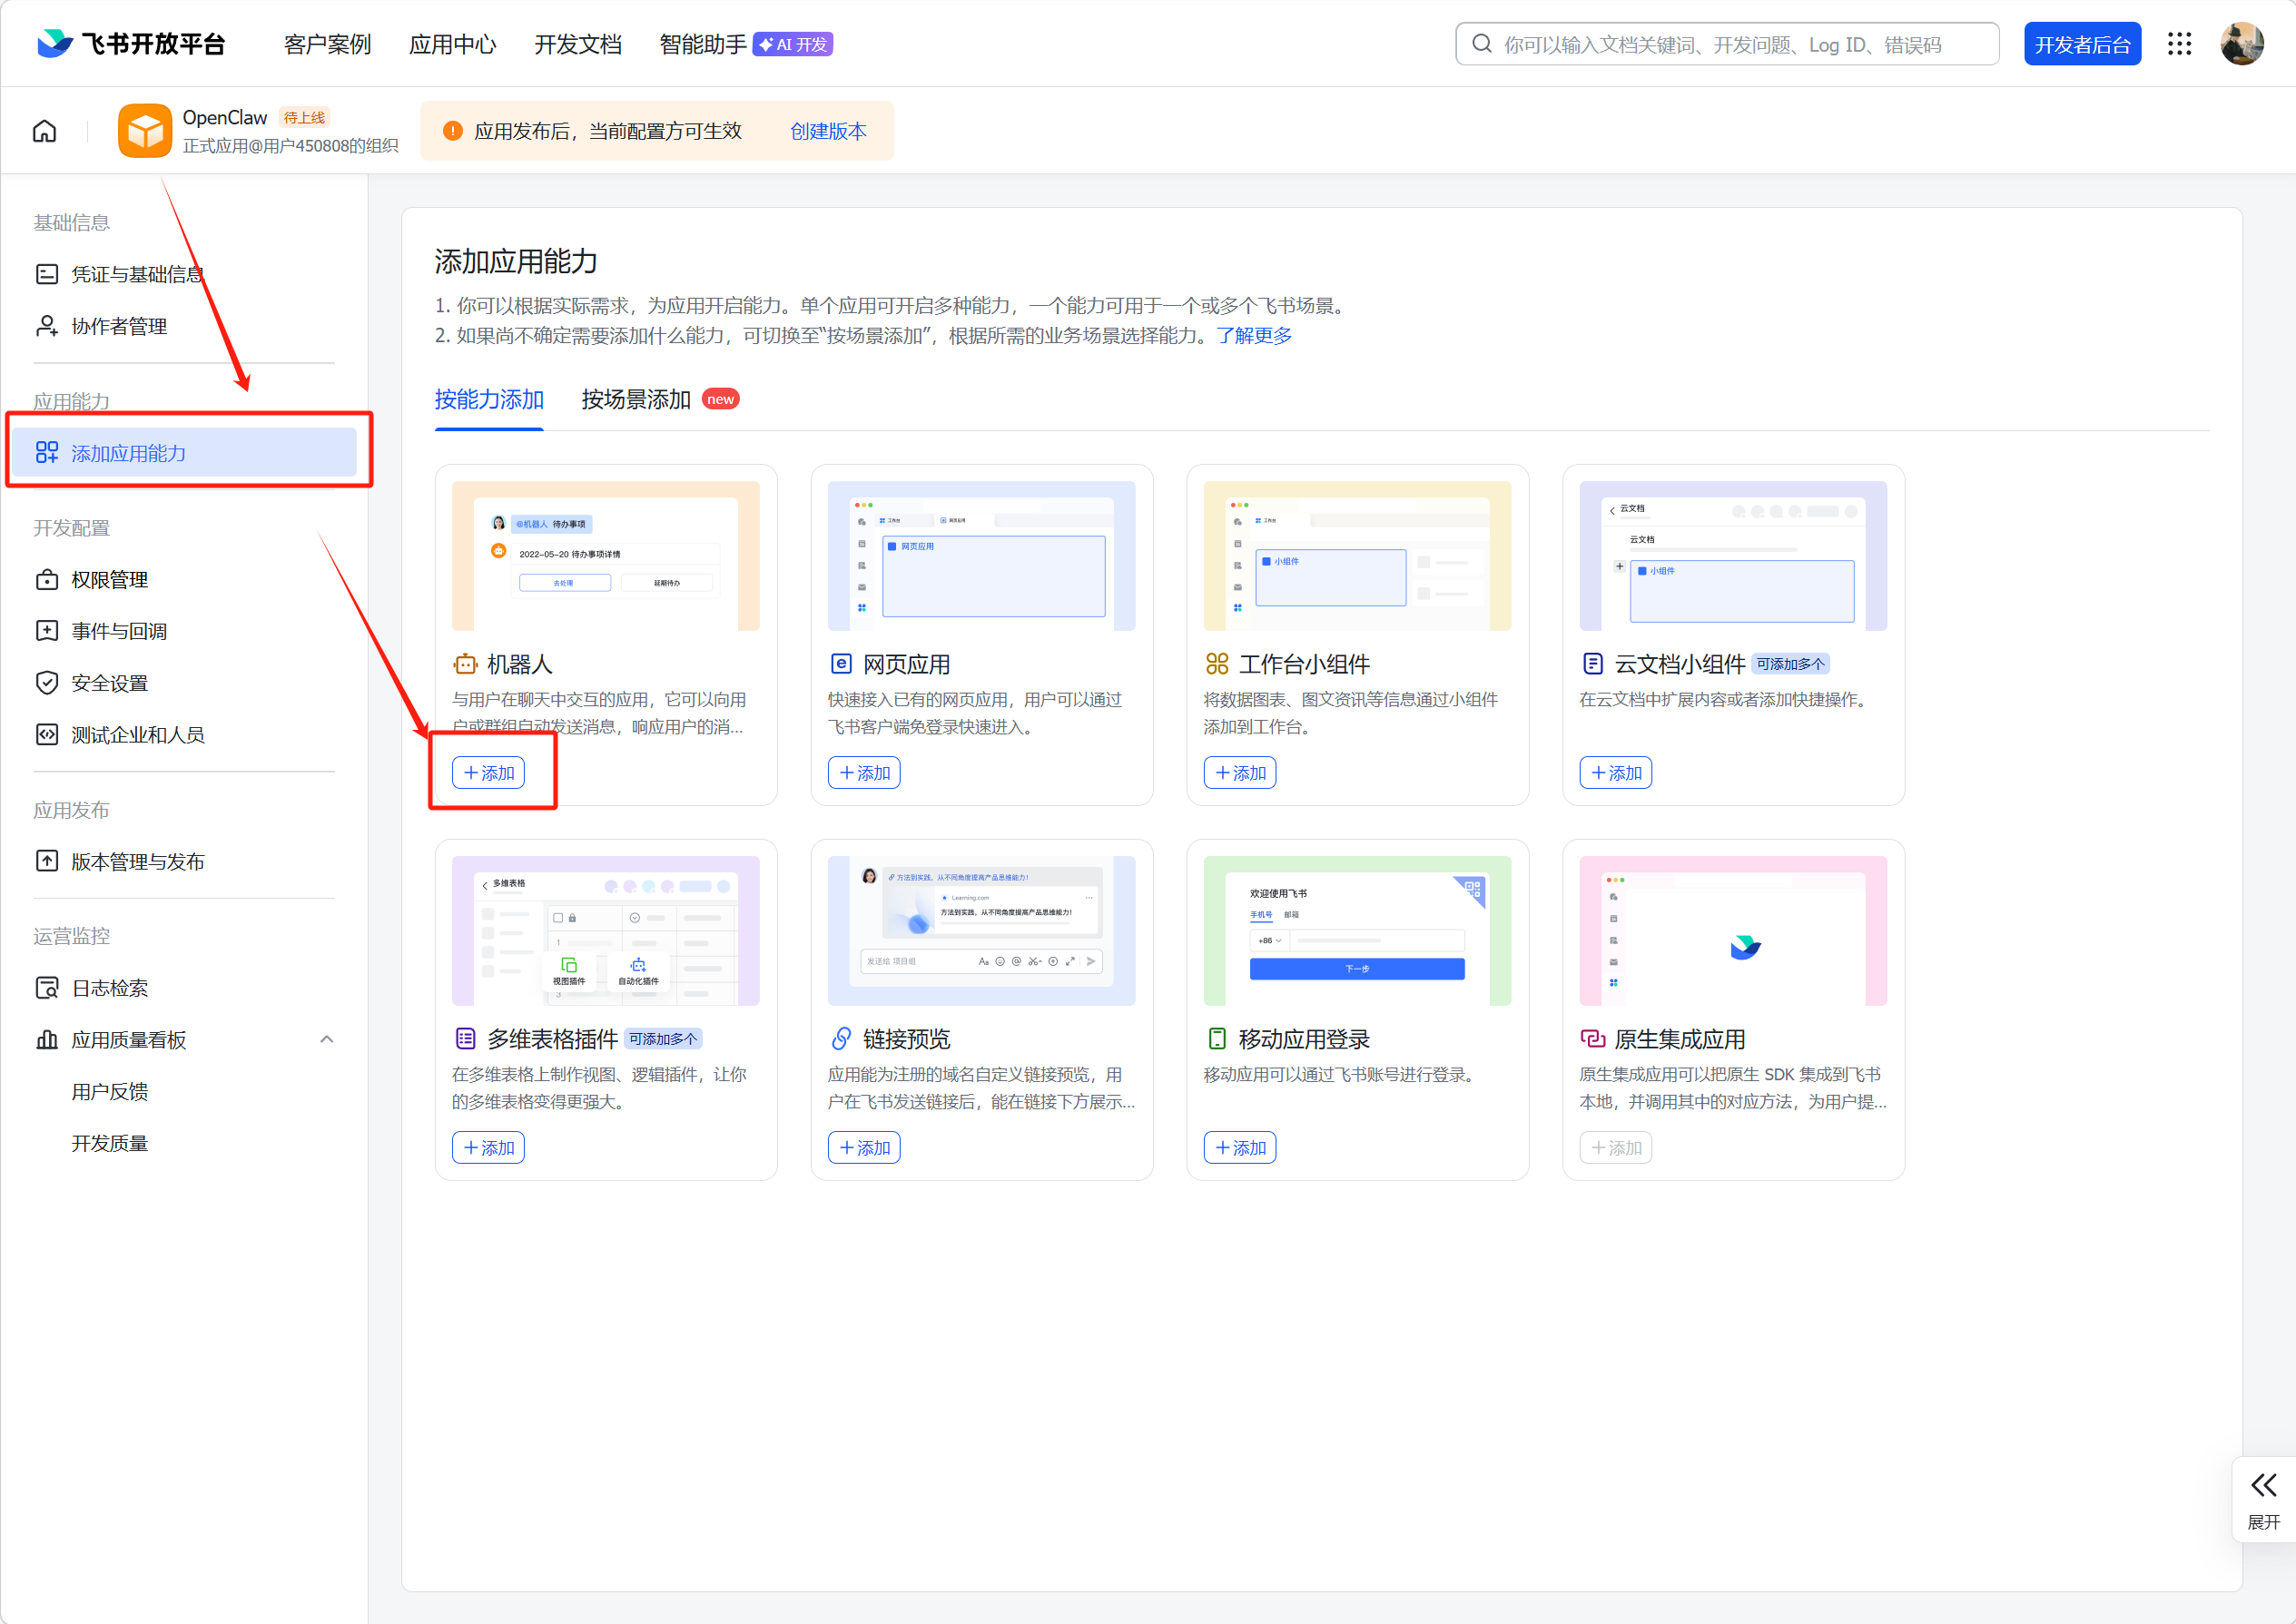
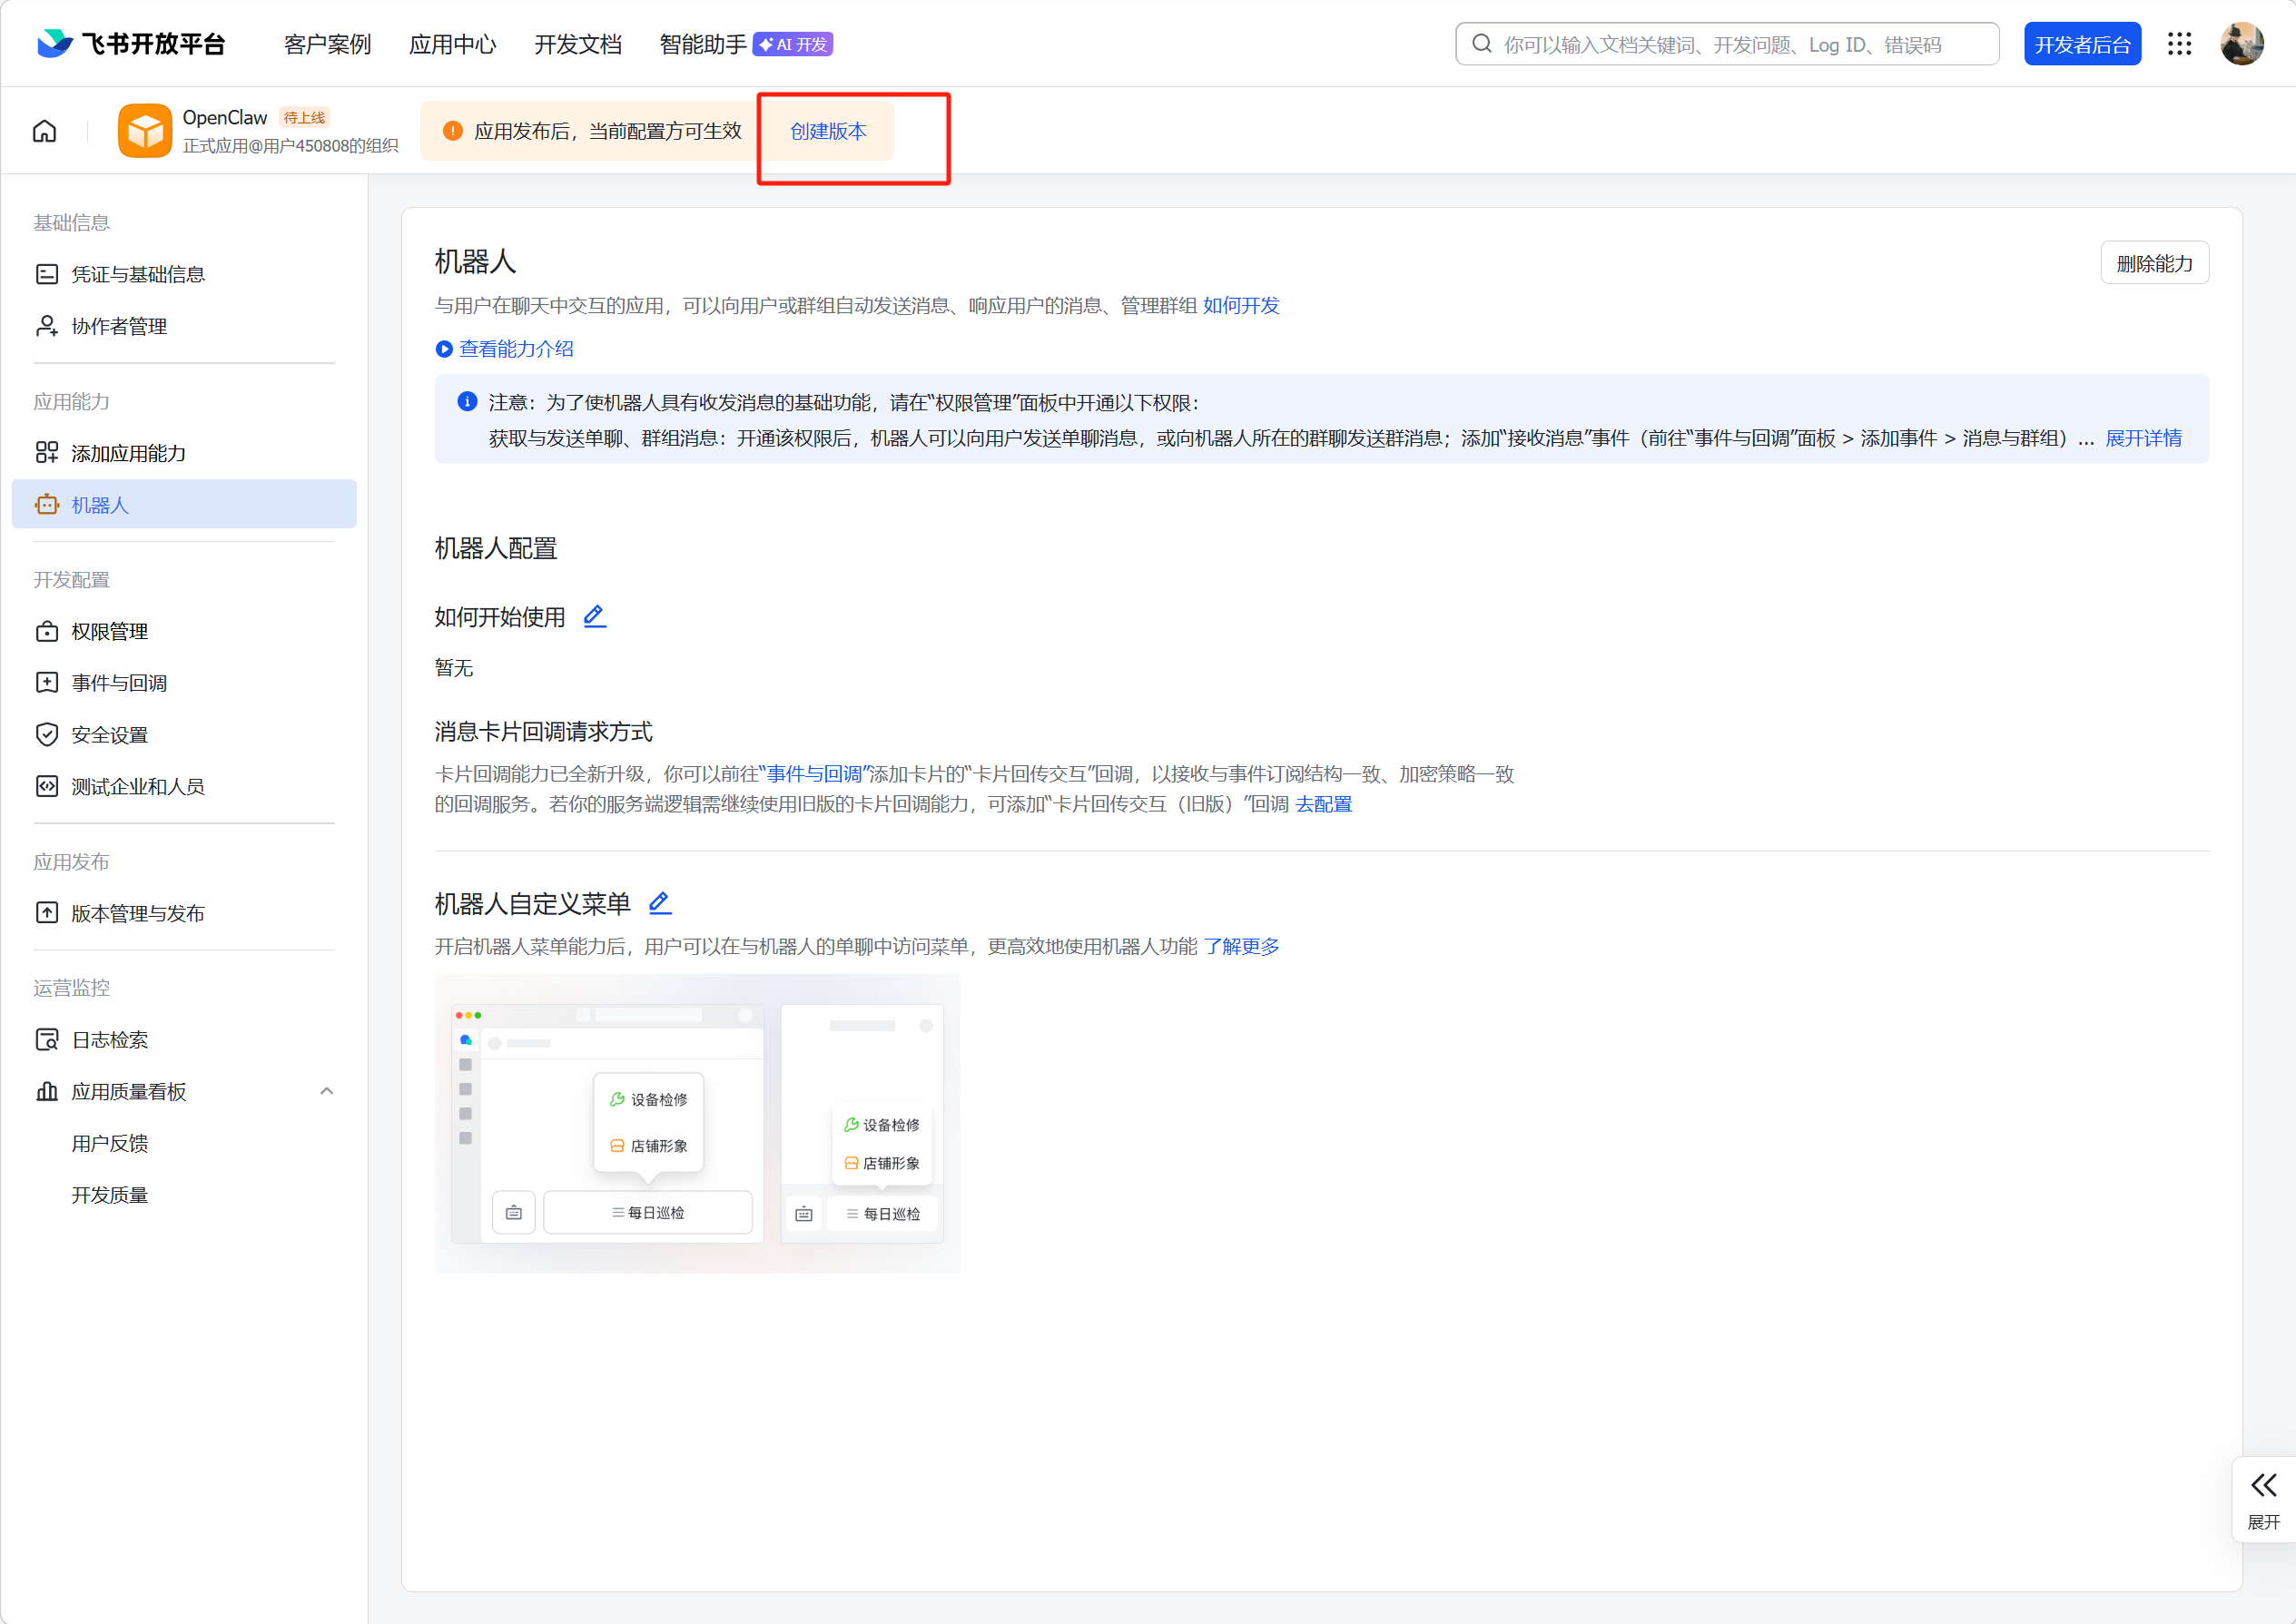
3. 给应用添加机器人能力
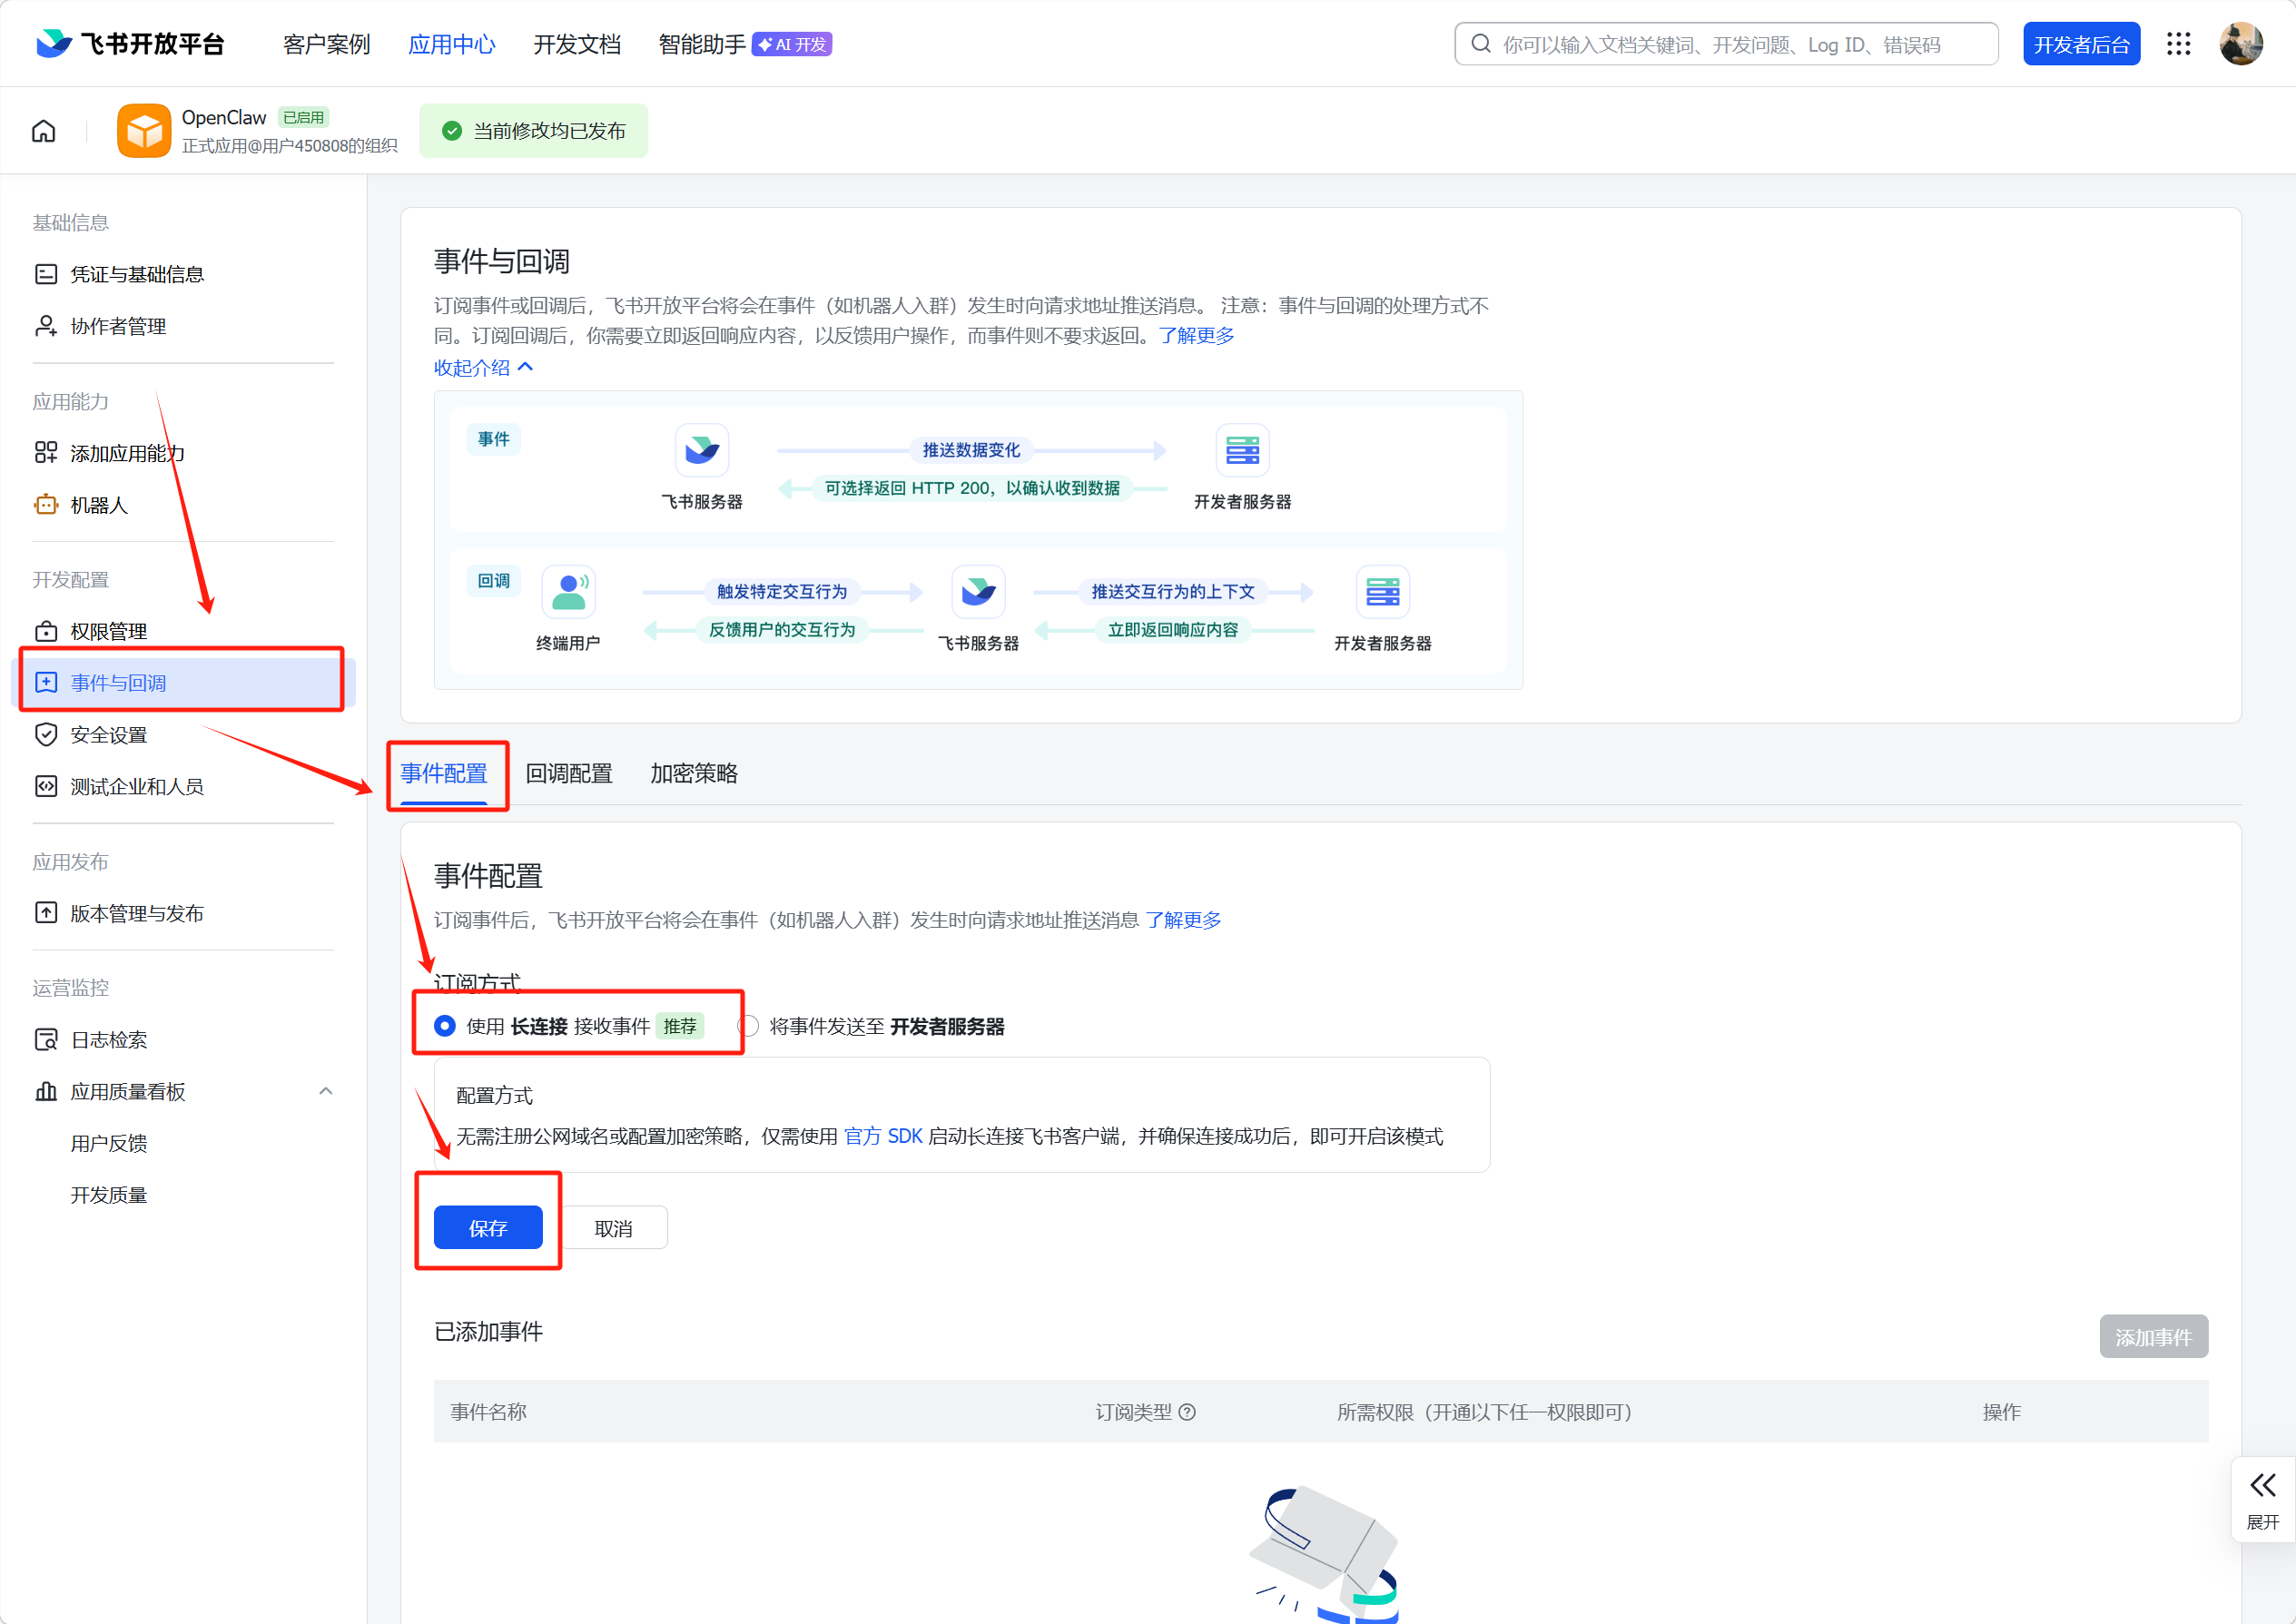
4. 配置飞书事件回调
事件与回调 --> 时间配置 --> 使用长连接接收事件 --> 保存
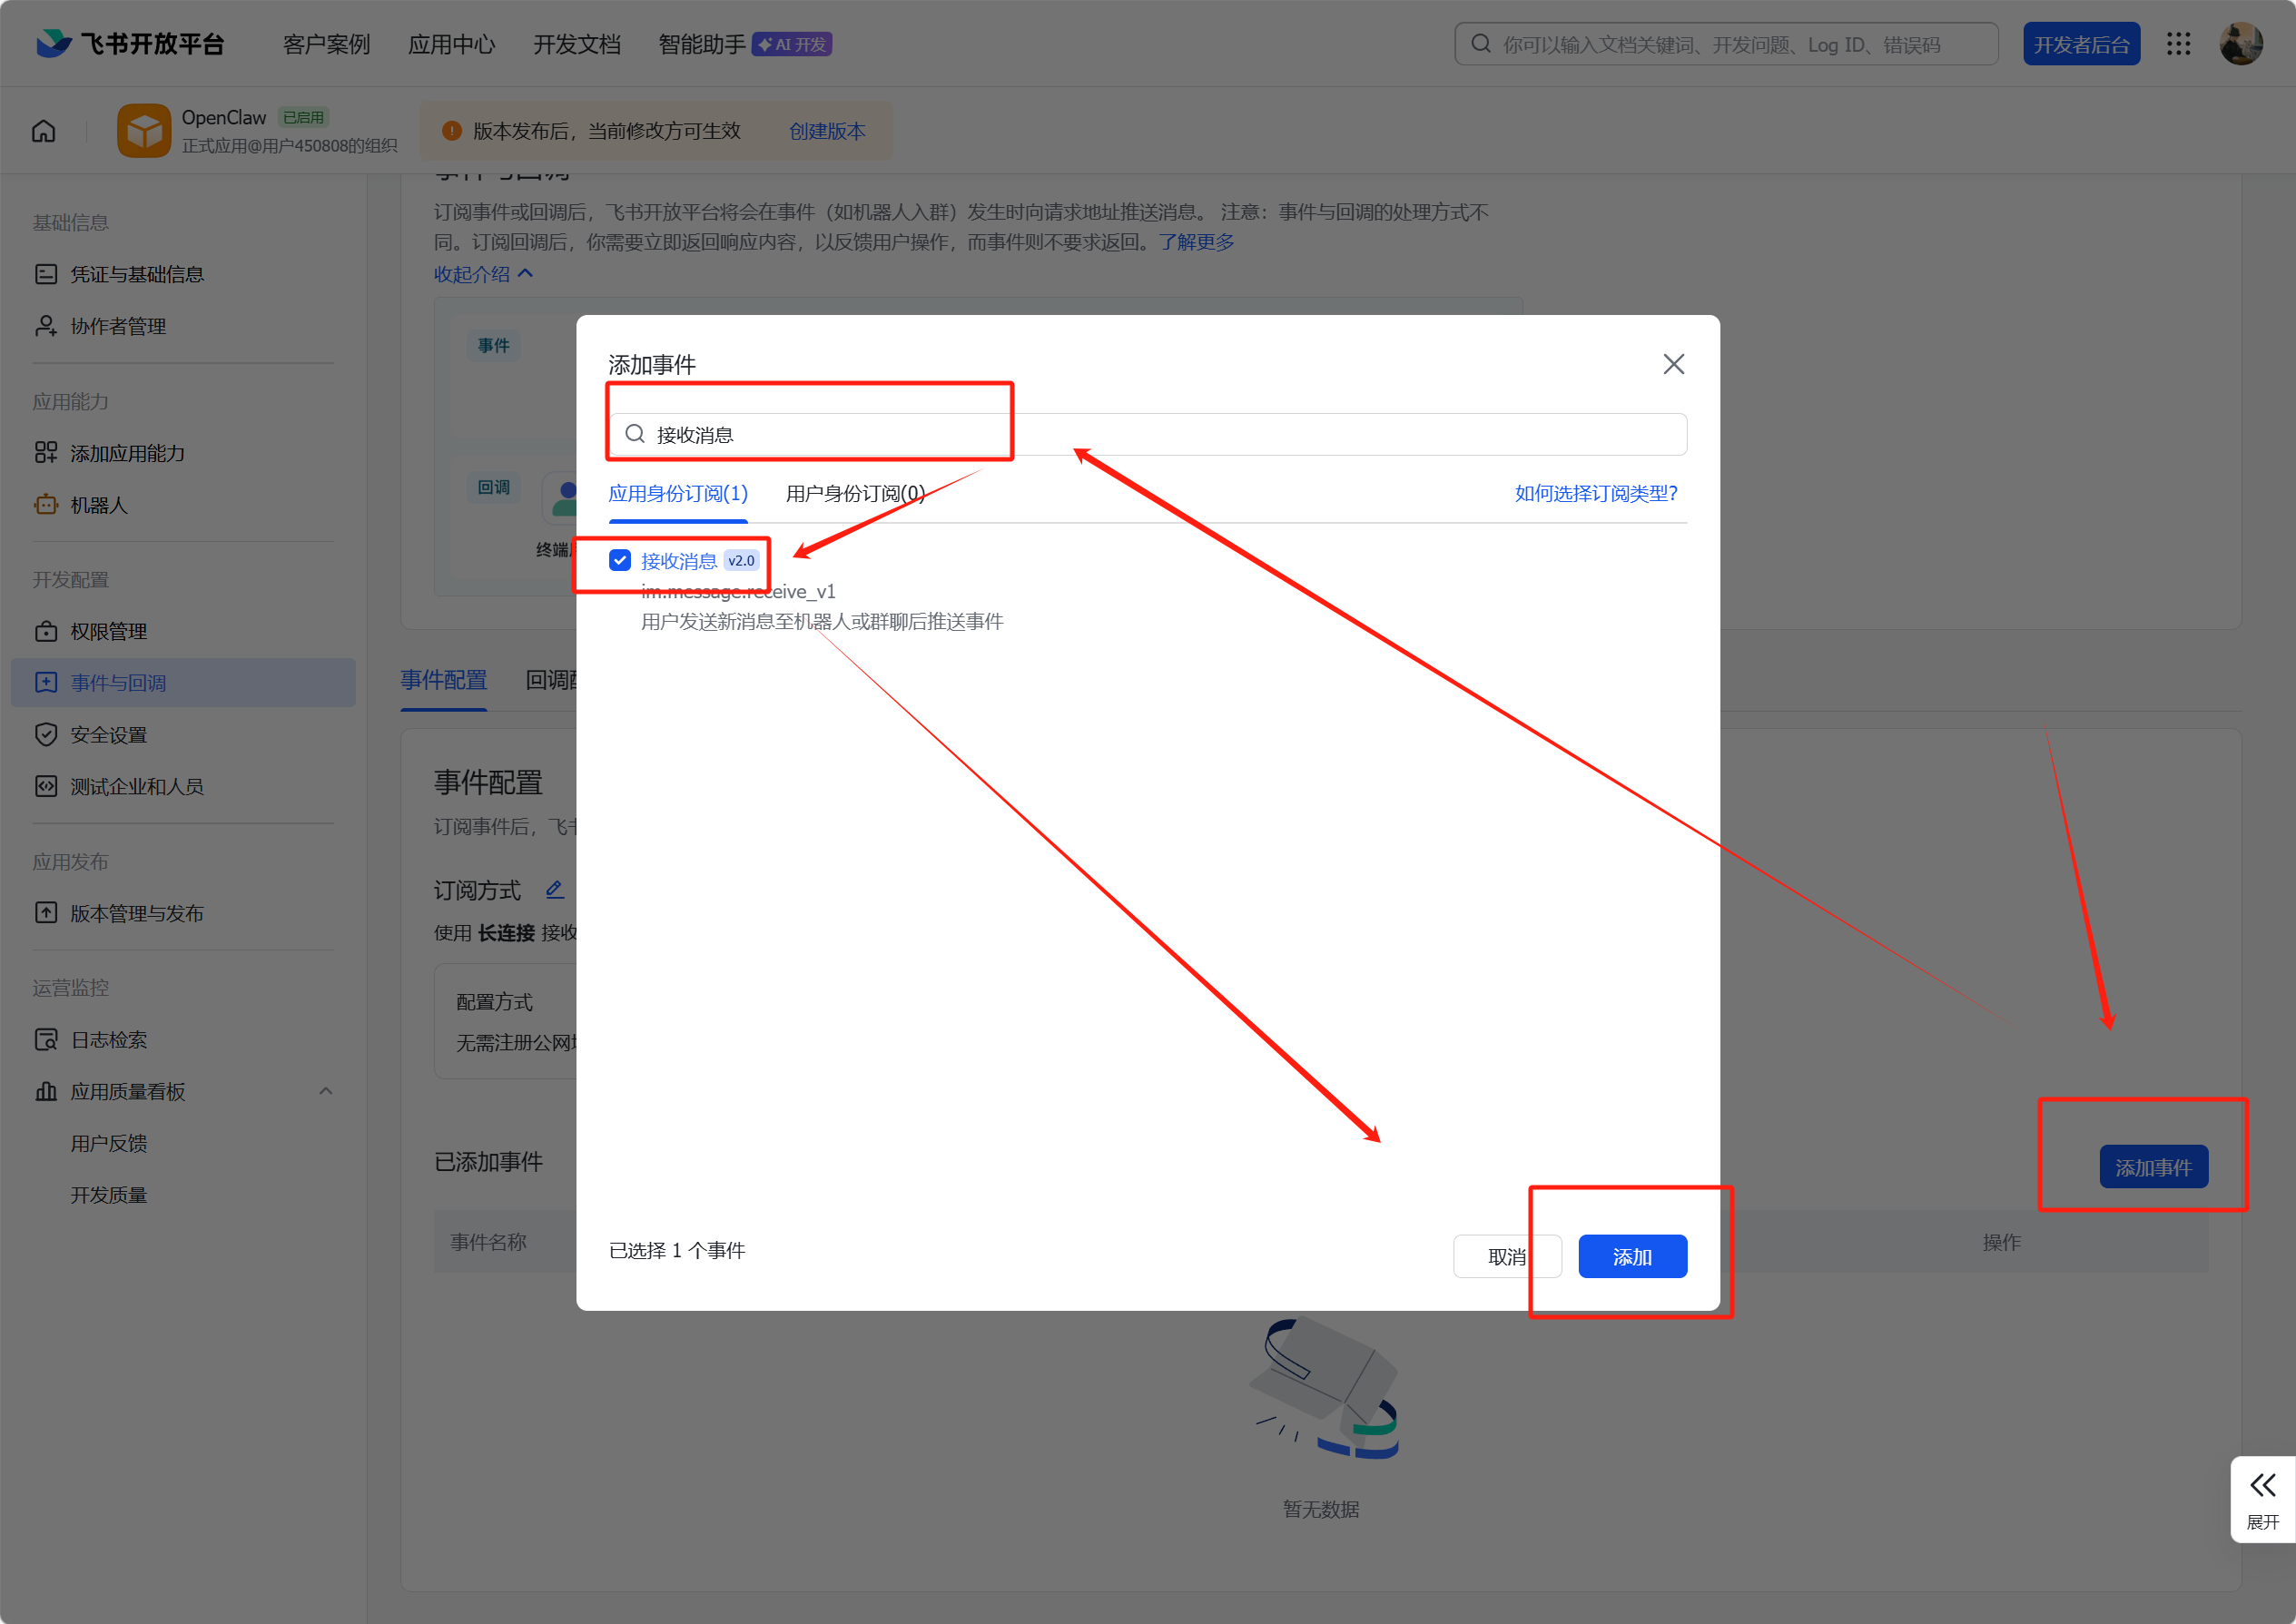
5. 添加回调事件
添加事件 --> 接收消息 --> 保存
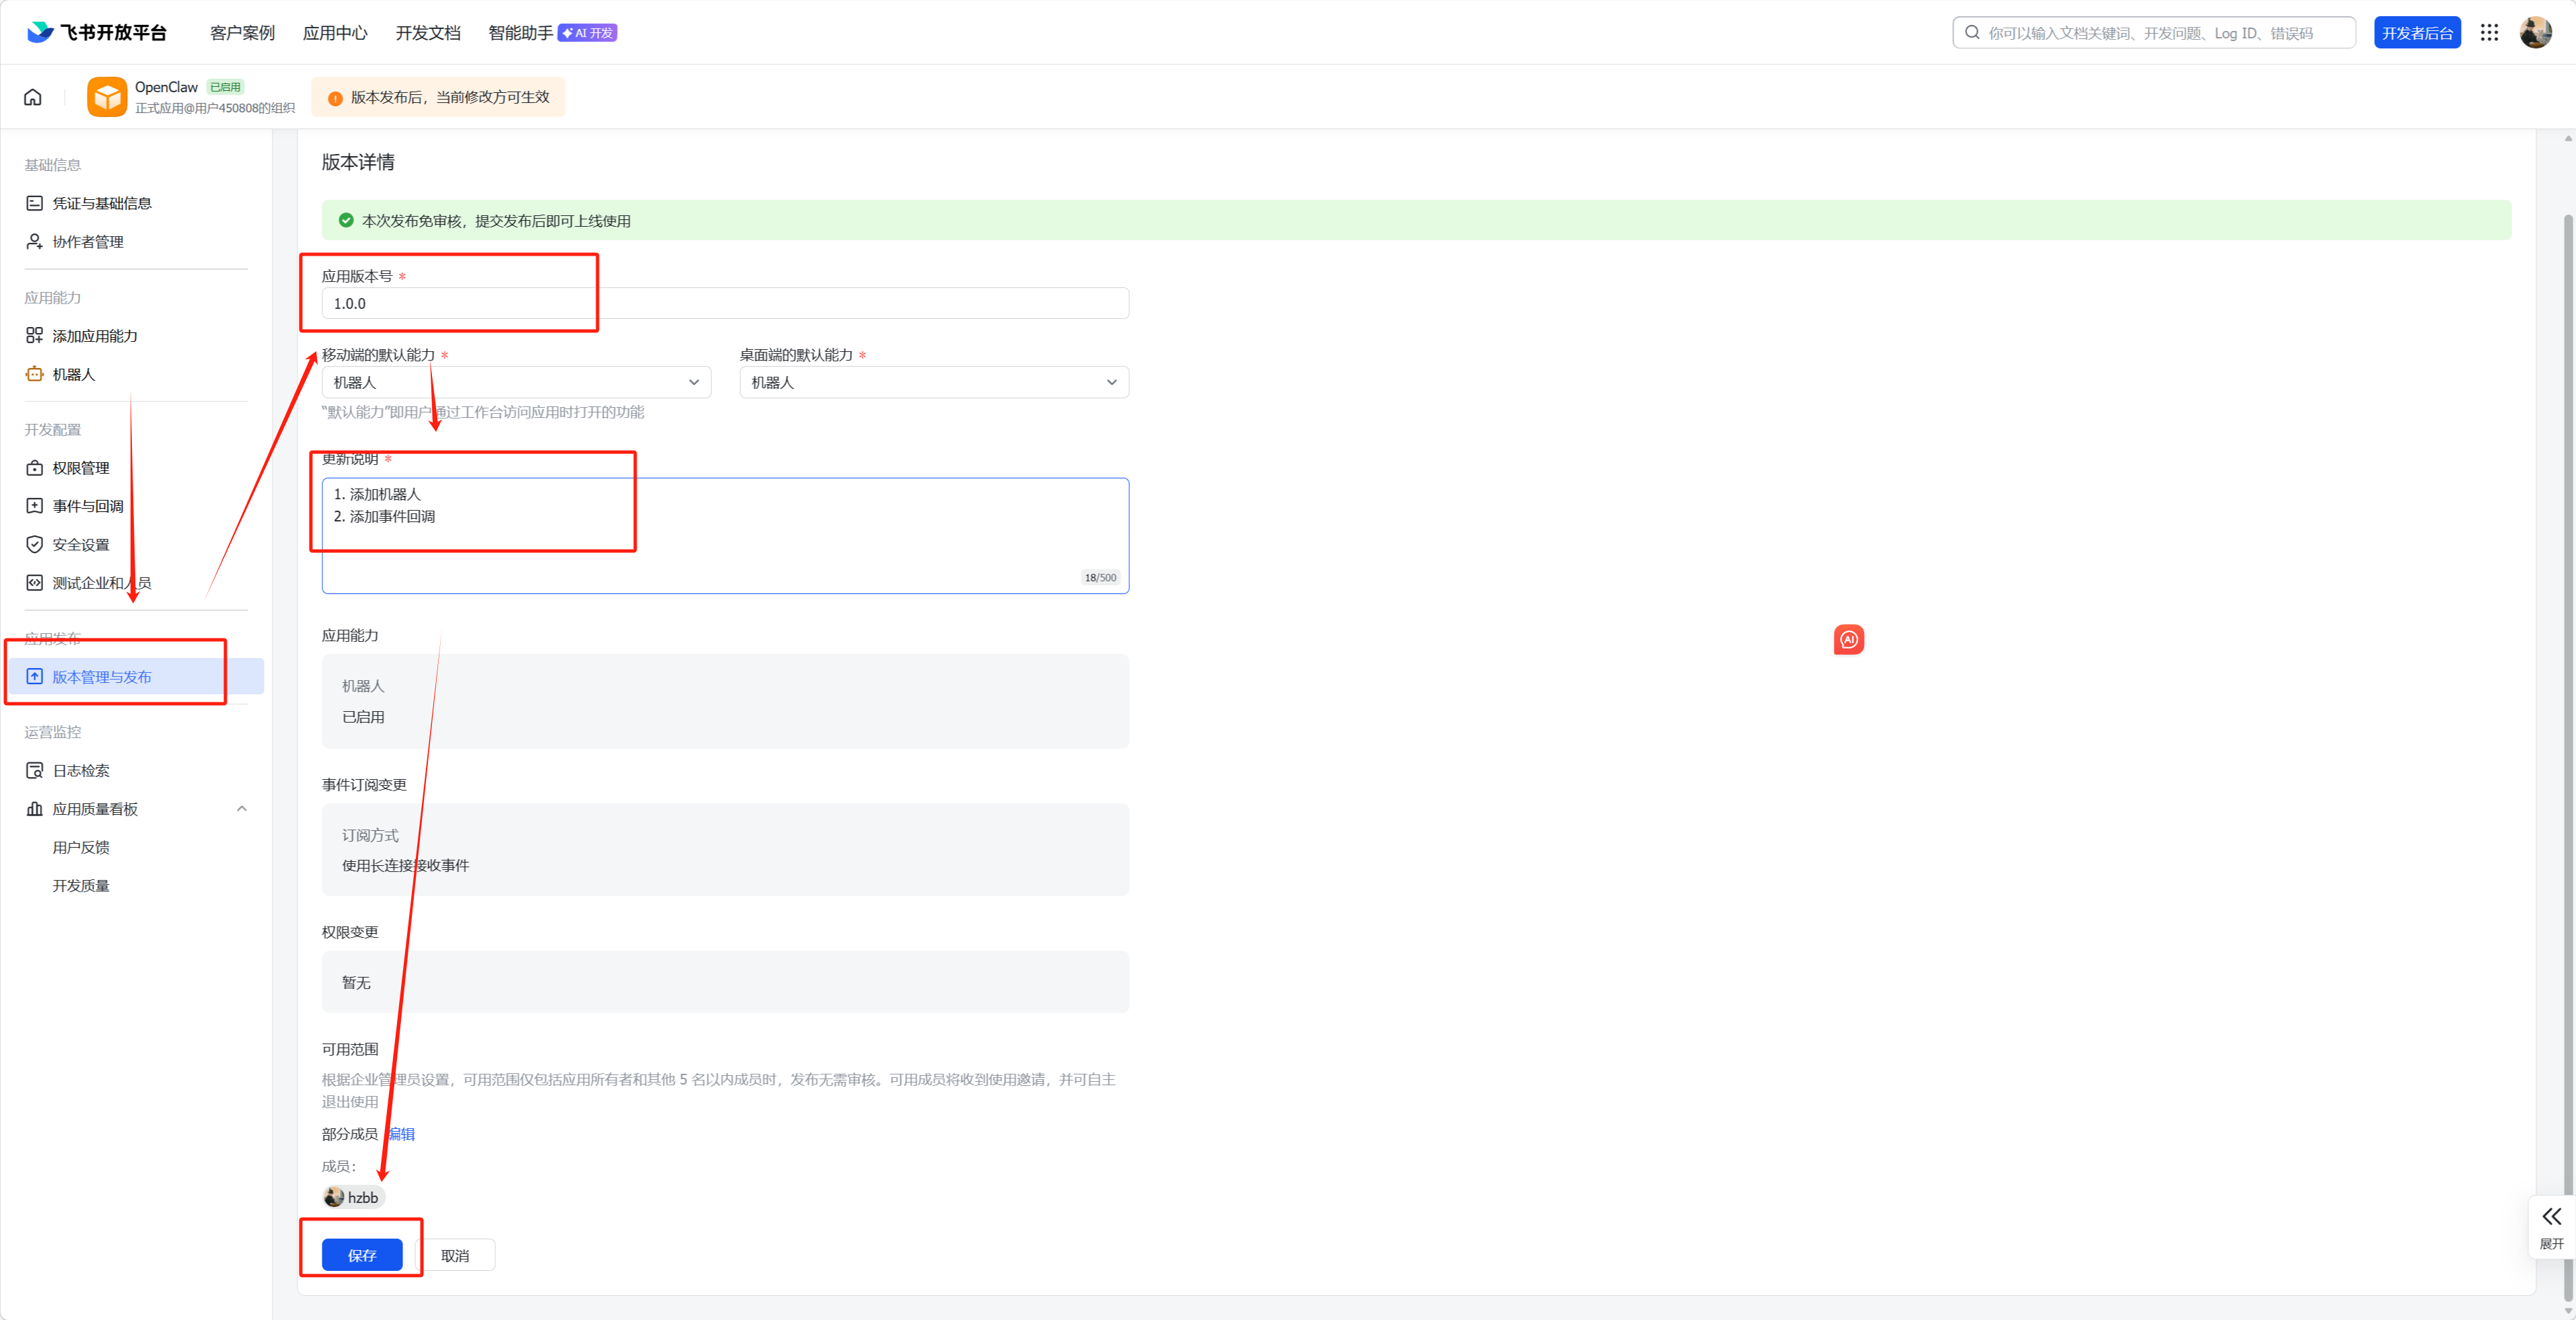
6. 发布应用版本
创建应用版本,随意填写然后保存确认发布

7. 安装 飞书/Lark 插件
OpenClaw 运行在容器中的话,以下命令则在容器内执行
docker exec -it openclaw /bin/bash   # 进入容器,非容器环境不用执行
openclaw plugins install @m1heng-clawd/feishu
8. 配置飞书通知渠道
openclaw config
◆  Where will the Gateway run?
│  ● Local (this machine) (No gateway detected (ws://127.0.0.1:18789))
│
◆  Select sections to configure
│  ● Channels (Link WhatsApp/Telegram/etc and defaults)
│
◆  Channels
│  ● Configure/link (Add/update channels; disable unselected accounts)
│
◆  Select a channel
│  ● Feishu/Lark (飞书) (needs app creds)
│
◆  How do you want to provide this App Secret?
│  ● Enter App Secret (Stores the credential directly in OpenClaw config)
│
◆  Enter Feishu App Secret   # App Secret 和 App ID 在开发者后台”凭证与基础信息“中
│  ******************
│
◆  Enter Feishu App ID   #  App ID
│  ***************
│
◆  Feishu connection mode
│  ● WebSocket (default)
│
◆  Which Feishu domain?
│  ● Feishu (feishu.cn) - China
│
◆  Group chat policy
│  ● Open - respond in all groups (requires mention)
│
◆  Select a channel
│  ● Finished (Done)
│
◆  Configure DM access policies now? (default: pairing)
│  ● Yes / ○ No
│
◆  Feishu DM policy
│  ● Open (public inbound DMs)
│
◆  Select sections to configure
│  ● Continue
│
9. 重启 OpenClaw
cd ~/openclaw
docker-compose restart
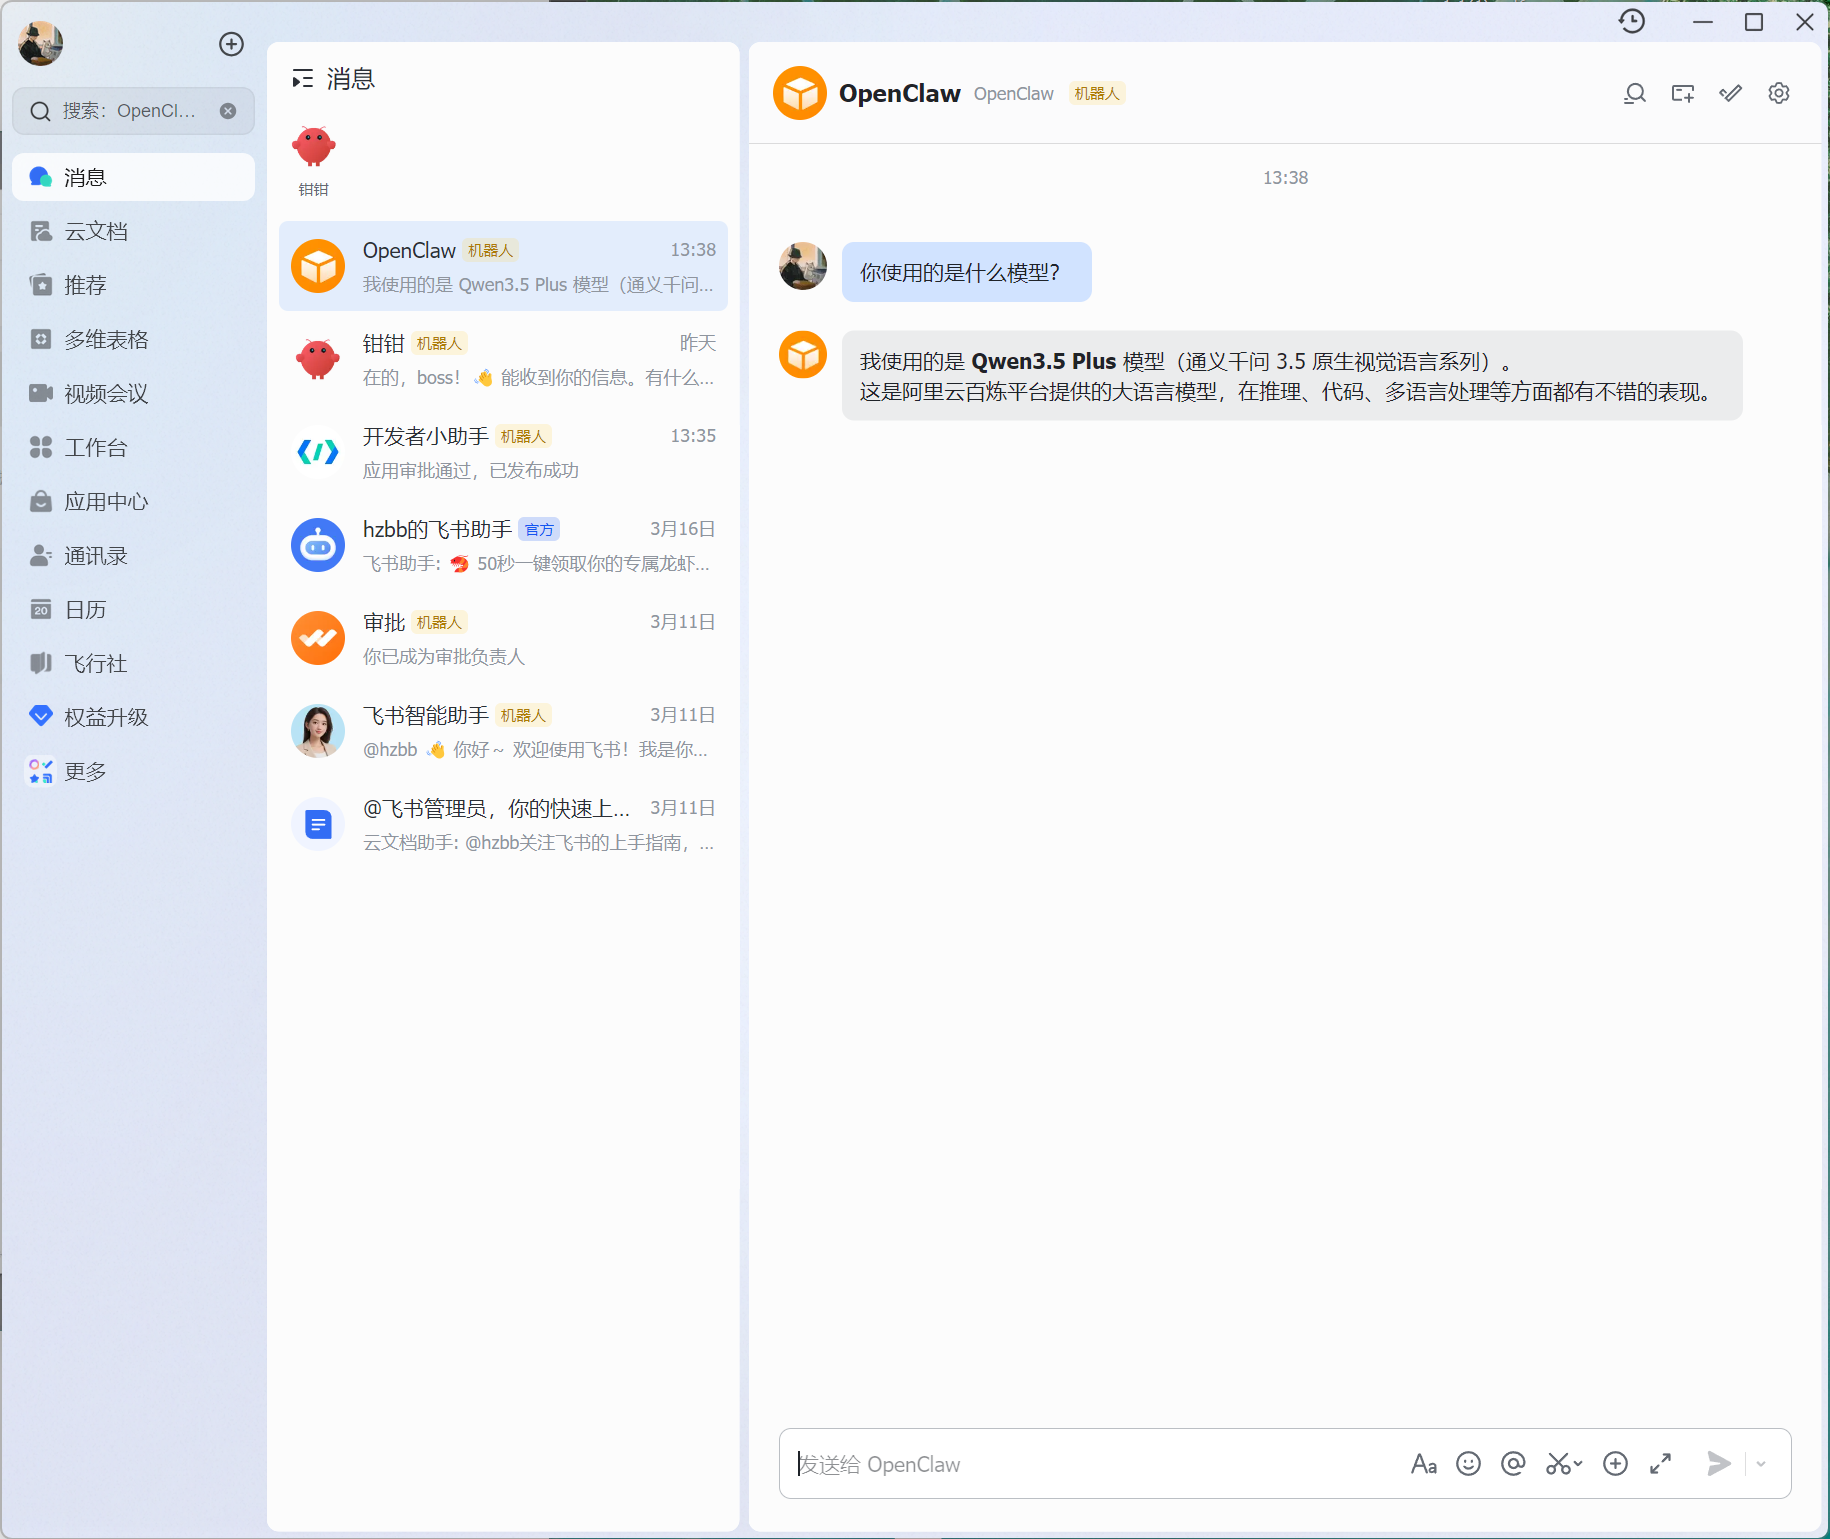
10. 打开飞书应用
搜索'OpenClaw'
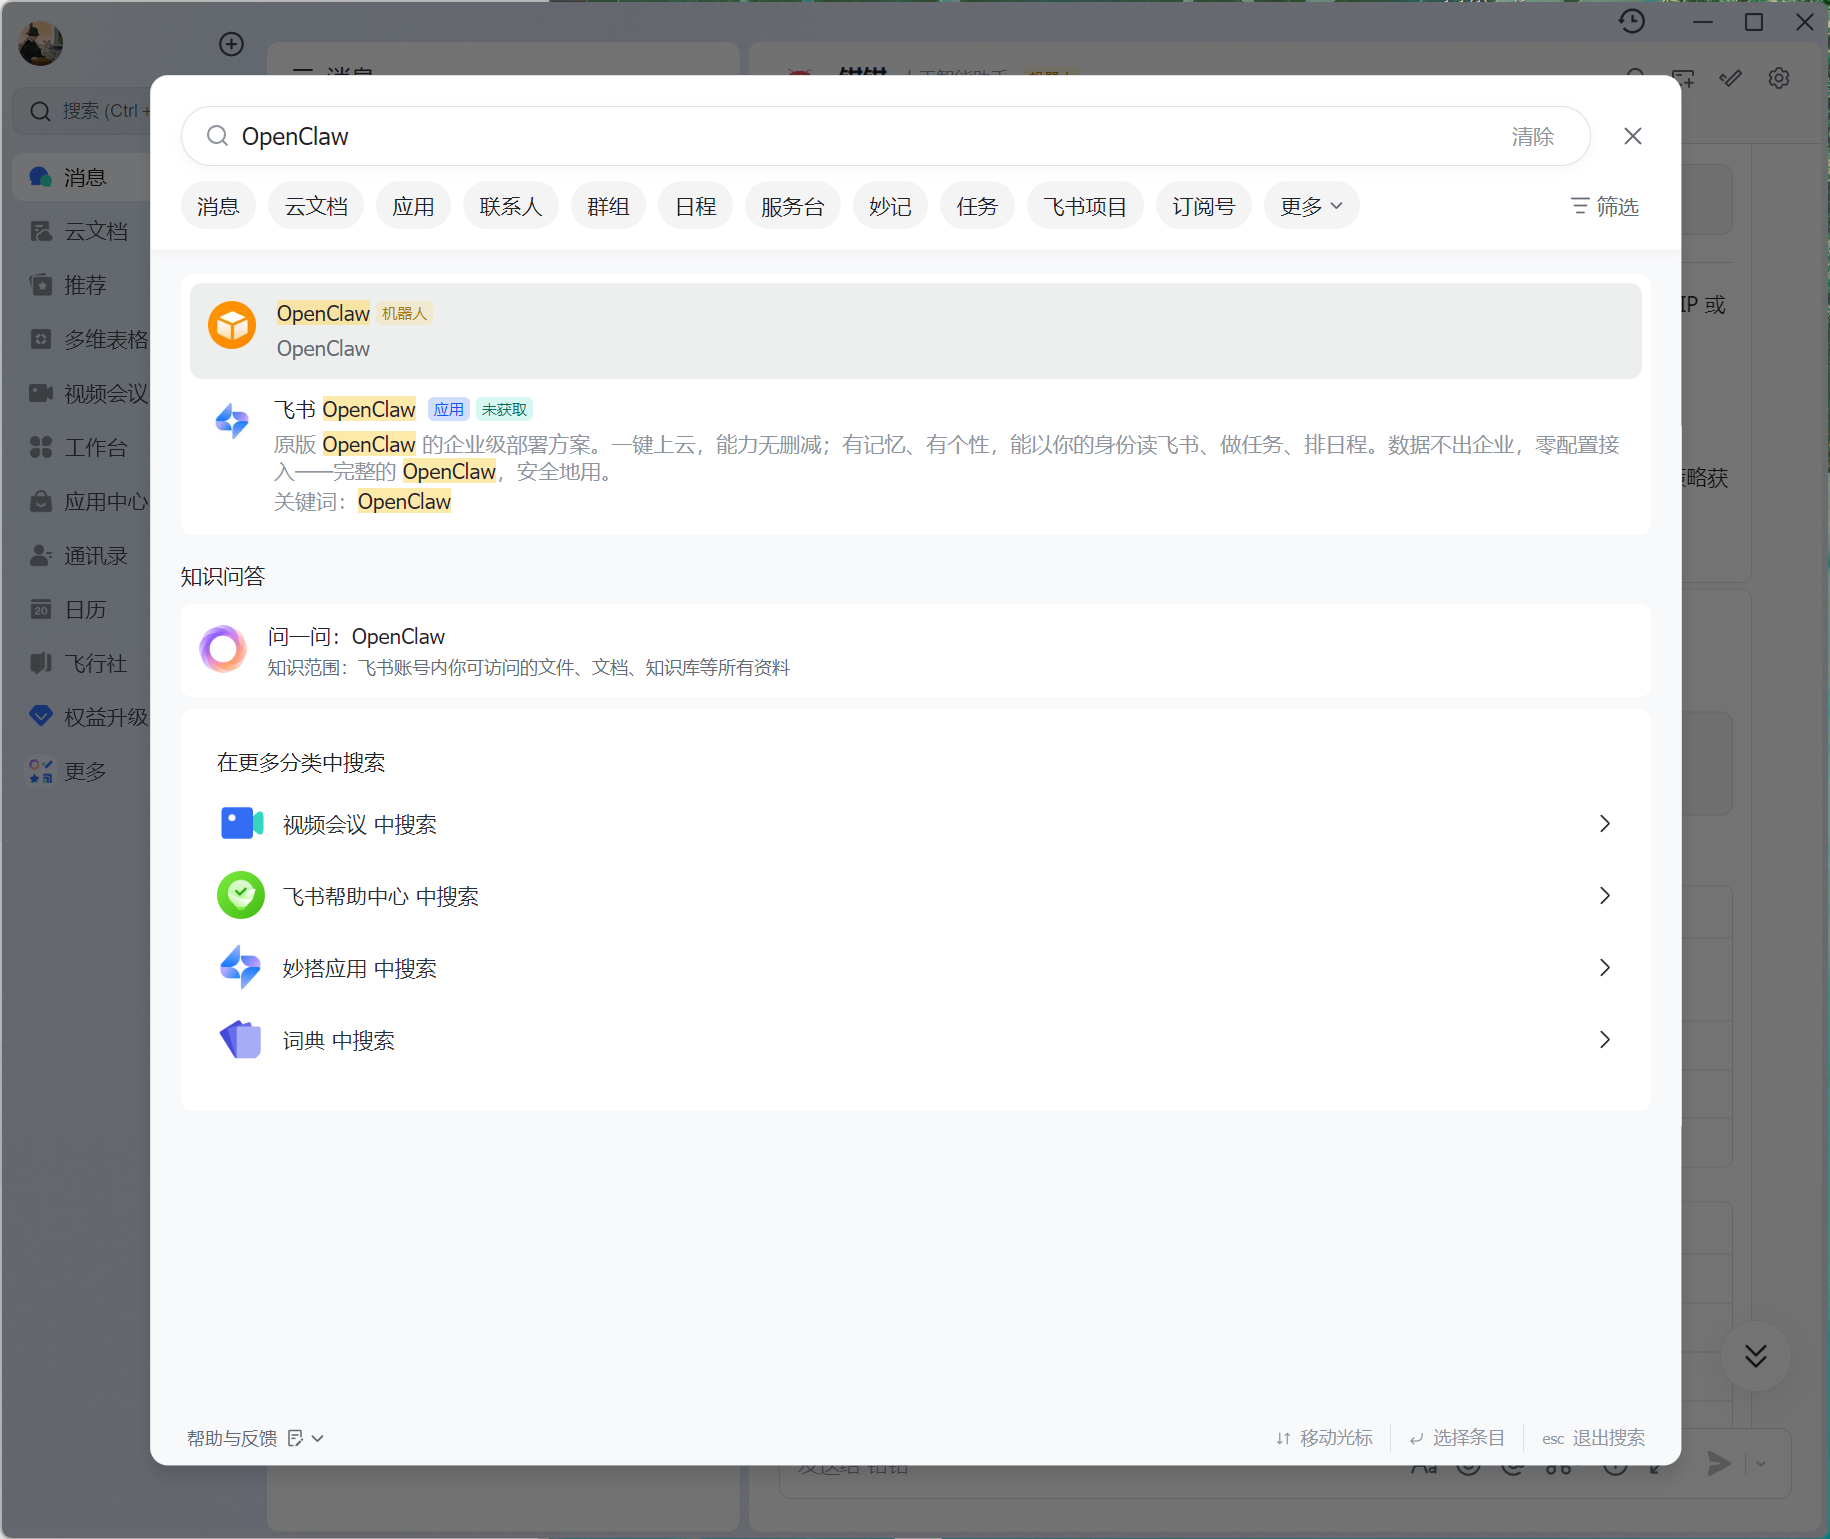
验证OpenClaw是否接入成功
版权声明:
本站所有文章除特别声明外,均采用 CC BY-NC-SA 4.0 许可协议。转载请注明来自
运维小记 | 专注运维技术分享!
喜欢就支持一下吧
打赏
 微信
微信
支付宝
 微信
微信
 支付宝
支付宝